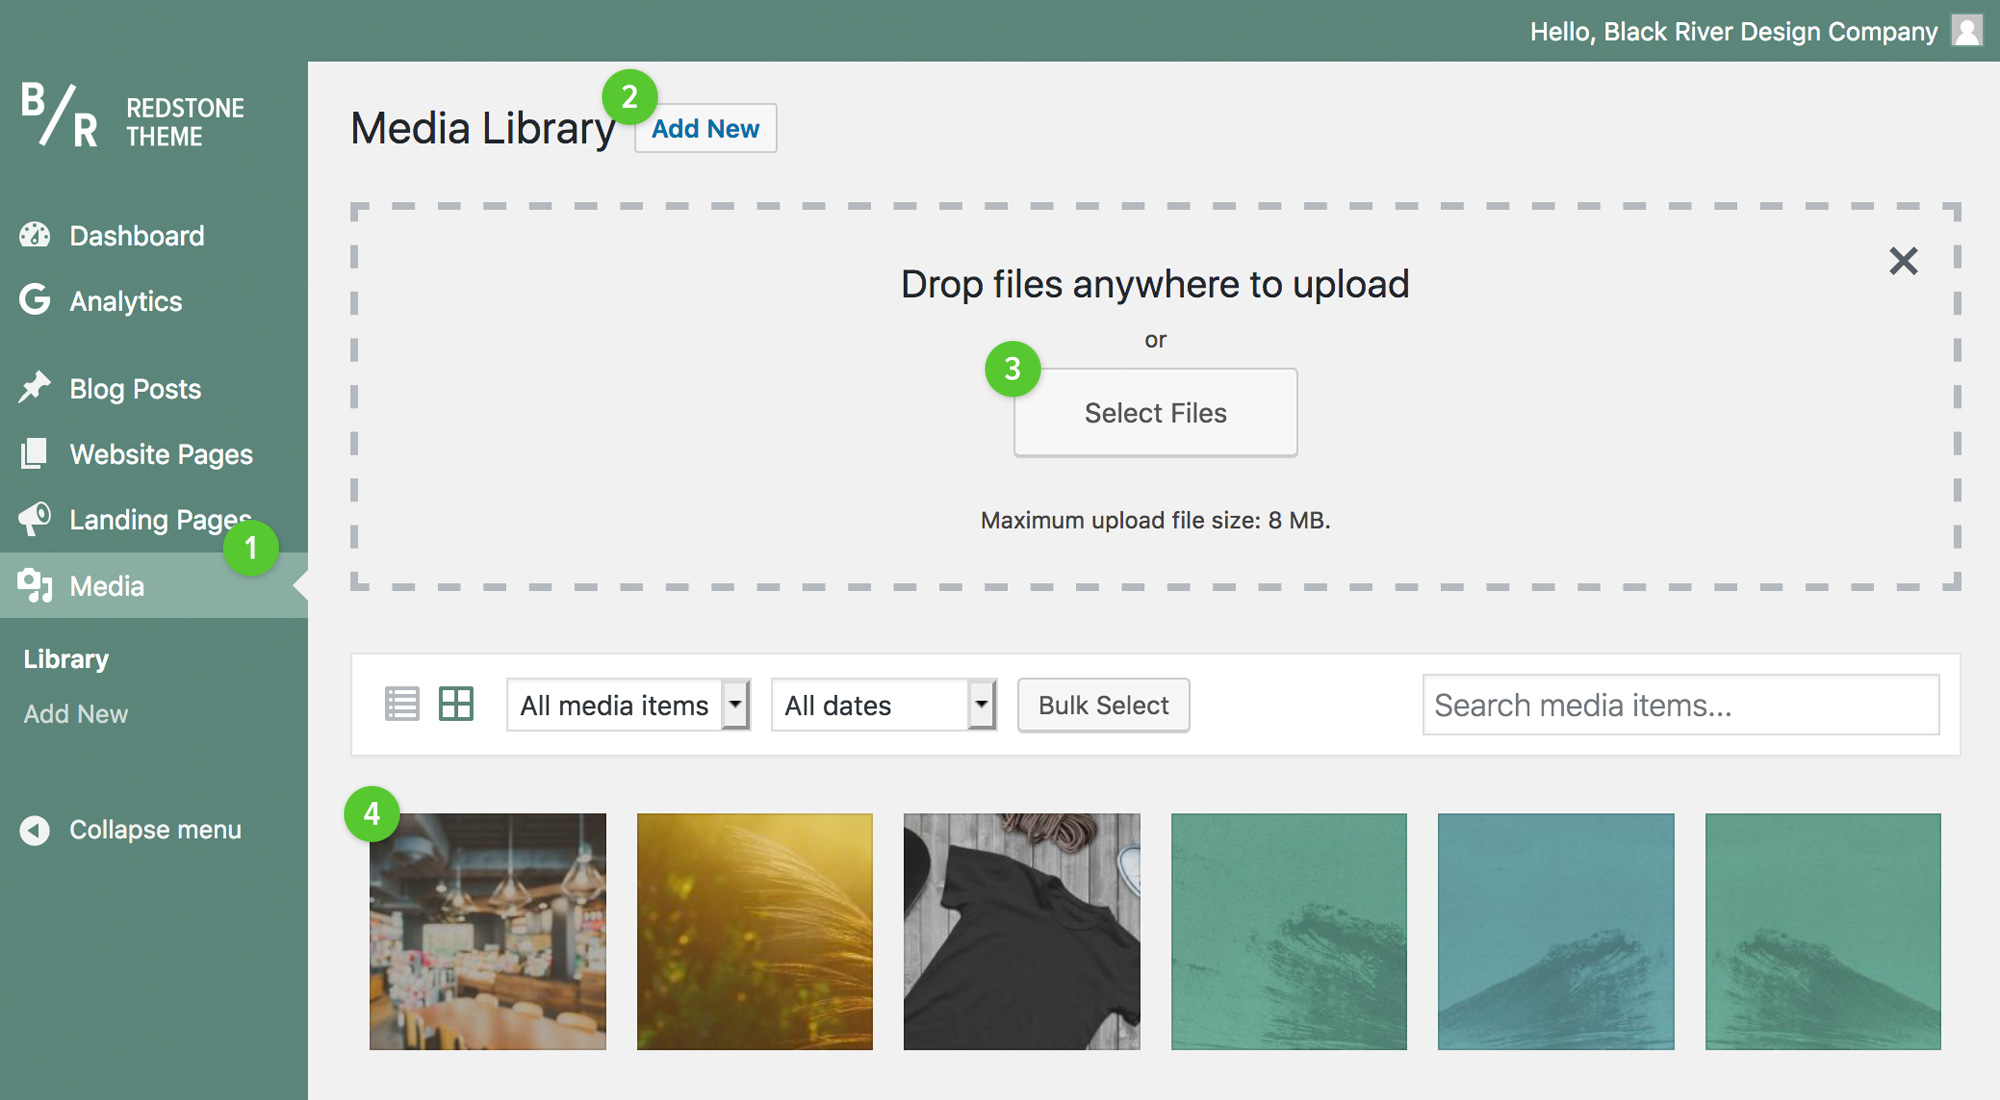
1. Navigate to your Media section in the admin dashboard (1).
2. Click the Add New button (2) to open the Upload box.
3. Select the file from your local computer by clicking the Select Files button (3), or by dragging and dropping your file into the designated area.
4. Your file will show up in the available media area (4) when the upload has finished.
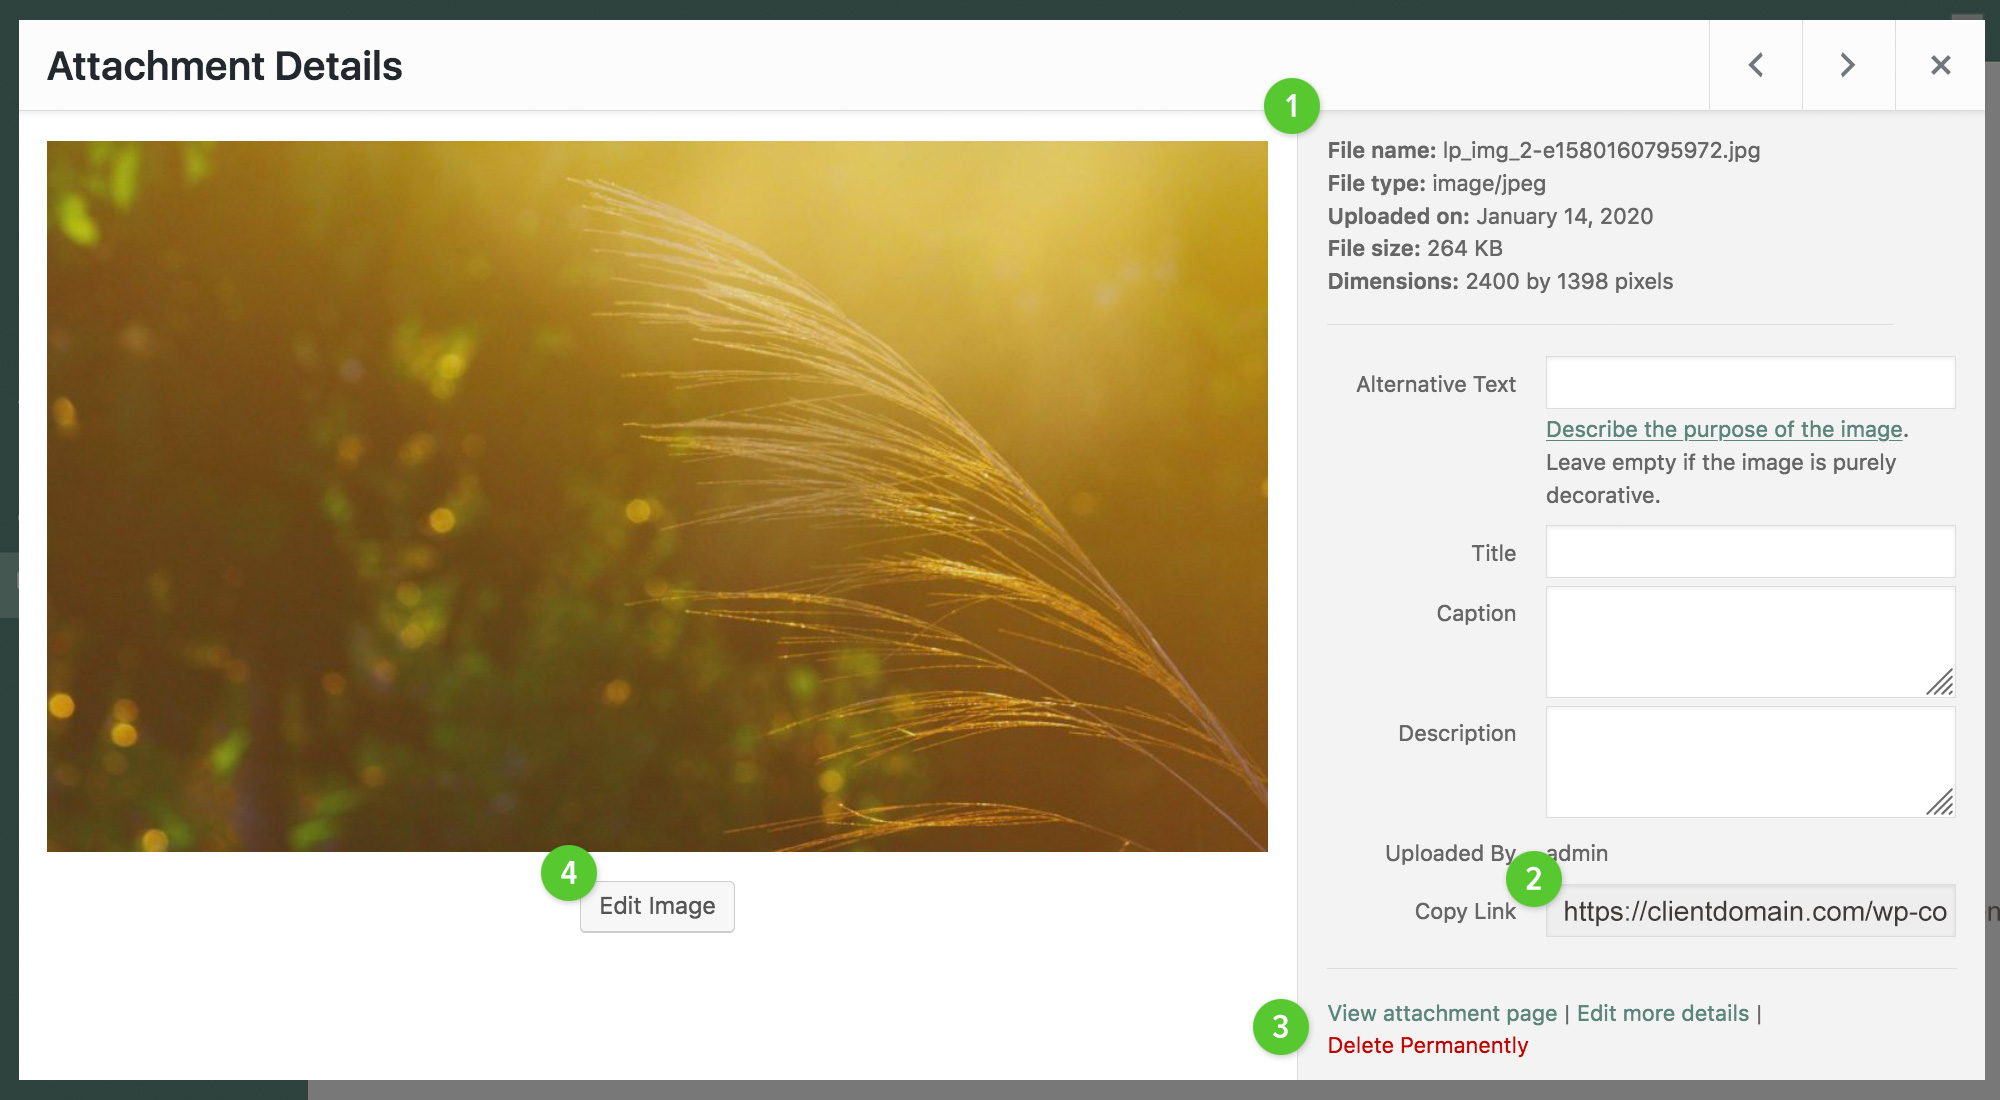
1. Navigate to your Media section in the admin dashboard and click on the image or file you want to view.
2. Copy and paste the Copy Link URL (2) to share your file on Social Media or via email.
3. Delete your file permanently by clicking the Delete Permanently button (3).
4. Simple edits can be done to your uploaded image files, like re-sizing and cropping.

1. Navigate to your Media section in the admin dashboard and click on the image you want to resize. On the screen that pops up, click the Edit Image button below the image.
2. Use the Scale Image area (1) to resize your image. A minumum of 1200 pixels wide is recommended.
3. Use the Crop button (2) and Image Crop Selection area (3) to crop your photo. Recommended crop size is 1200 x 800 pixels minimum, width bigger images maintaining aspect ratio (ie/. 2400 x 1600 pixels).
4. When you have finished editing your image, click the Save button (4).